Installing Java
You'll need to install the Java 1.8 JDK in order to compile your code for this class. First, head over to the Oracle website.
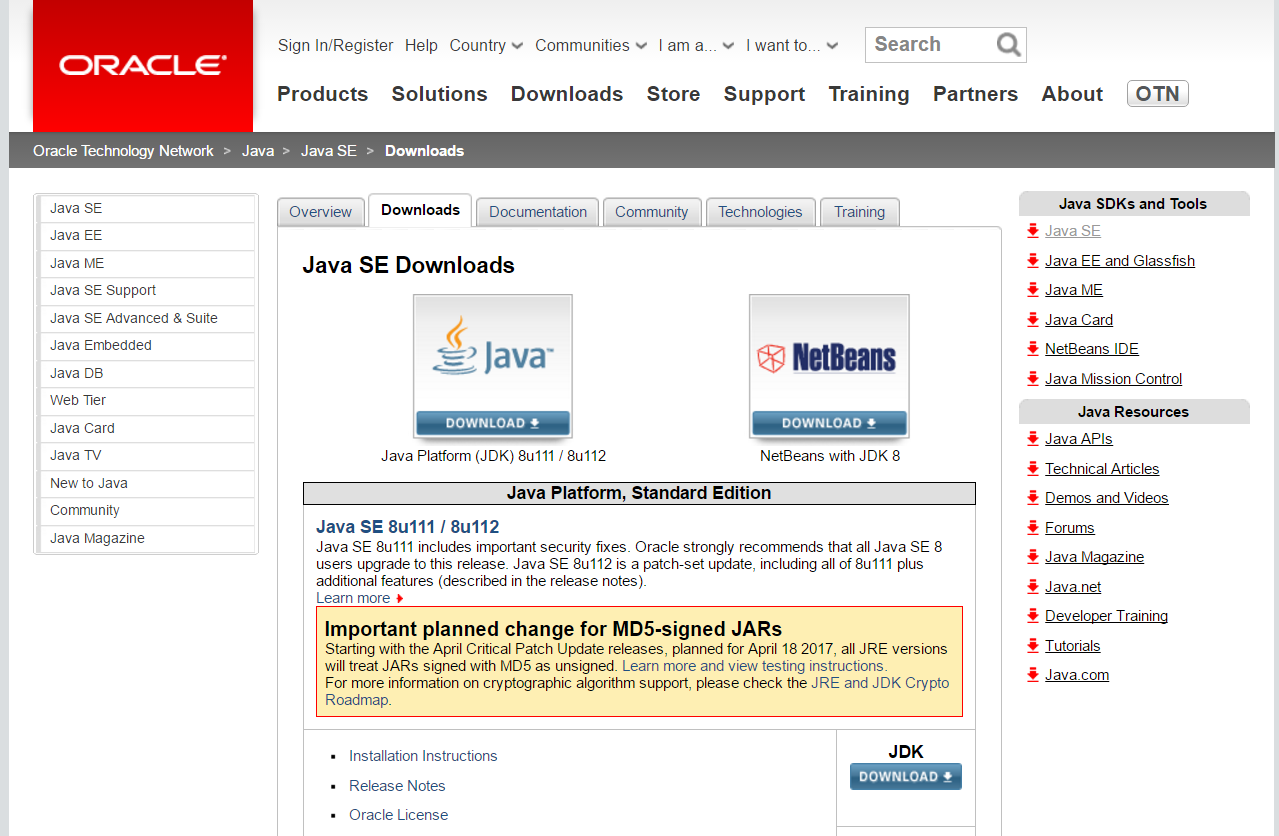
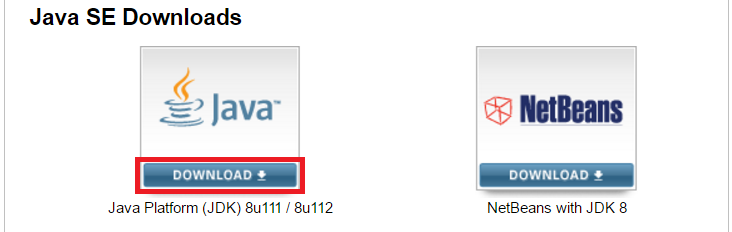
Click the "Download" button for the JDK.
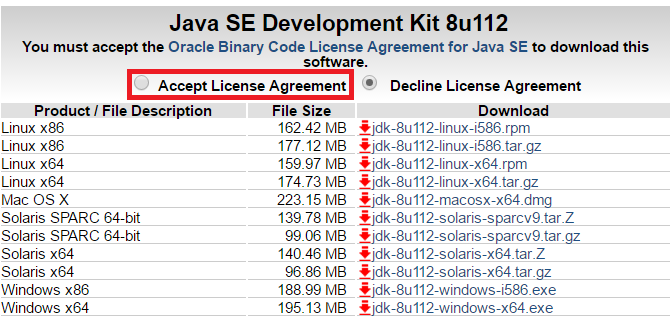
On the following page, find the download section entitled "Java SE Development Kit 8u112" (or a higher version number, if this is out of date) and agree to the license. Then proceed to download the binary file for your operating system.
- Run the install file and follow the prompts to install Java onto your computer.
A. Windows Setup
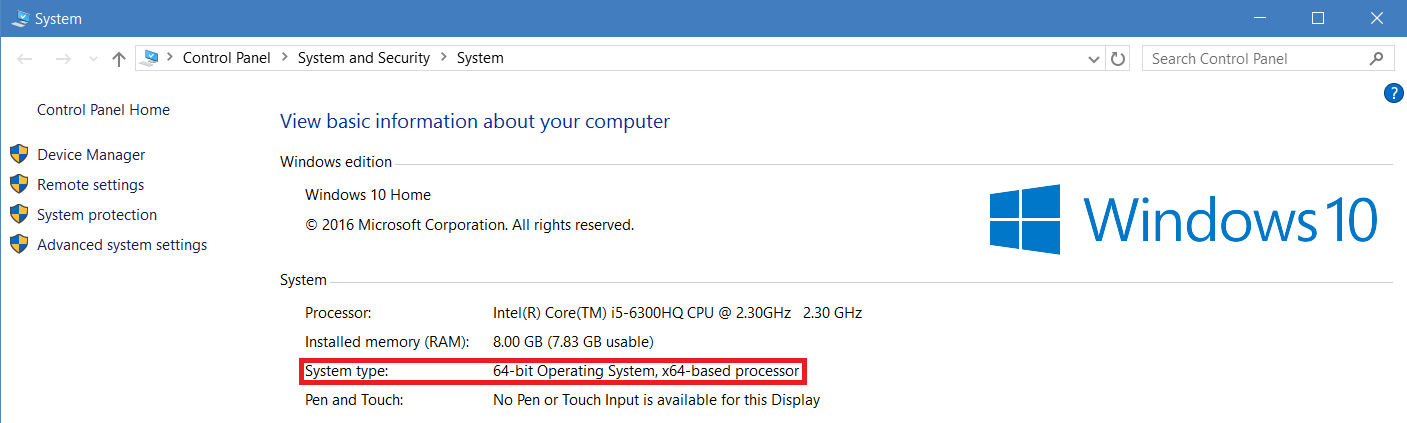
First, install Java (instructions provided under the previous Installing Java section). "Windows x86" is for 32 bit systems and "Windows x64" is for 64 bit systems. You can check which yours is by searching for "System" in the Windows Menu or Cortana and then checking the "System type".
Note that steps 2 and 3 below were done in CS 61A.
- Install Python 3. We'll need this for scripts to help make later projects run more smoothly. Let the Python installer add Python to your system's path.
Lastly, we'll need to install git and optionally, a bash shell. Head over here and grab Git for Windows and run the installer. If at any time you don't know what any of the jargon or options mean, you can just stick with the default options already selected for you.

Checking
Windows Explorer integrationwill let you do git things upon right-clicking a file or folder, more specifically, run Git Bash and the Git GUI respectively. This is not required, but might be handy.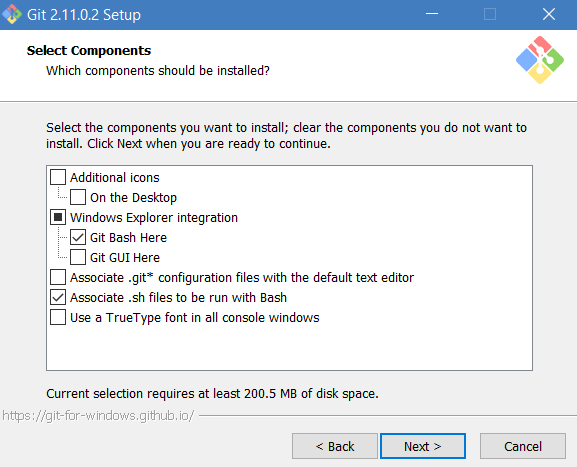
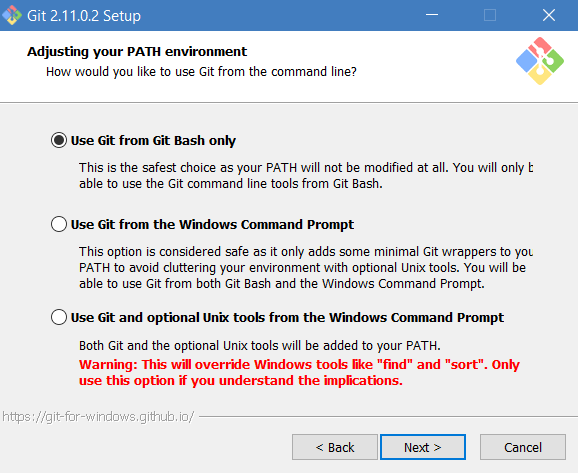
Git Bash is a bash shell with built-in git support and lets you use some MinGW/Linux tools. If you don't have a favorite bash terminal or shell (such as Cygwin), Git Bash is a good place to start. Using Git from Git Bash is the recommended option.
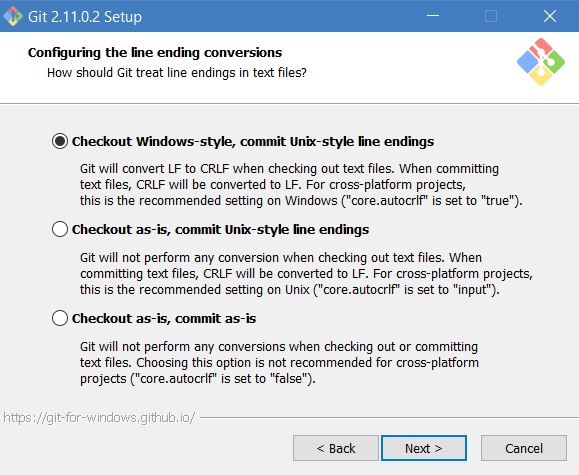
Windows and Unix based systems use different things to denote line endings in files. Use the recommended option (the first one) to avoid seemingly mysterious bugs down the road.
If you decide to use MinTTY, note that in the future if you want to run programs like interactive Python, they will need to be launched through
winpty. However don't let that scare you, there are plenty of StackOverflow posts on this subject. You can also set up an alias so that you can usepythonto execute the interactive interpreter instead ofwinpty pythonby including the linealias python='winpty python'in your bash profile at~/.bash_profile.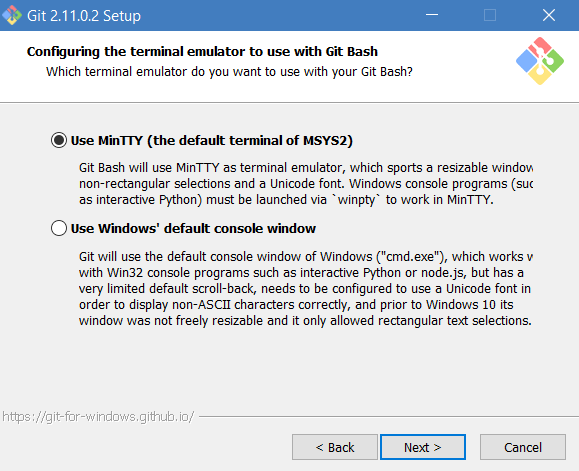
At this point, check to make sure everything has been installed properly.
- Open up your shell (e.g. Git Bash). Make sure
javacandjavaare recognized commands and thatjavac -versionandjava -versionrespond with the appropriate 1.8.0_112 version (or whatever is the most up to date version you installed). - Make sure
gitis a recognized command. - Also check that you have the correct Python version installed by running the
command
python -V(or the commandwinpty python -Vif you are using MinTTY and don't have aliases set up; you can see the bullet above for more information). Ifpythondoesn't give you Python 3, you can trypython3orpy.
If all this works, congratulations! You defeated Windows Java Setup! If not, try updating your environment variables, explained below.
- Open up your shell (e.g. Git Bash). Make sure
Updating your environment variables to include java and python. The fine- grain details of this will depend on your OS, but the first step is to open up your system (not user) environment variables...
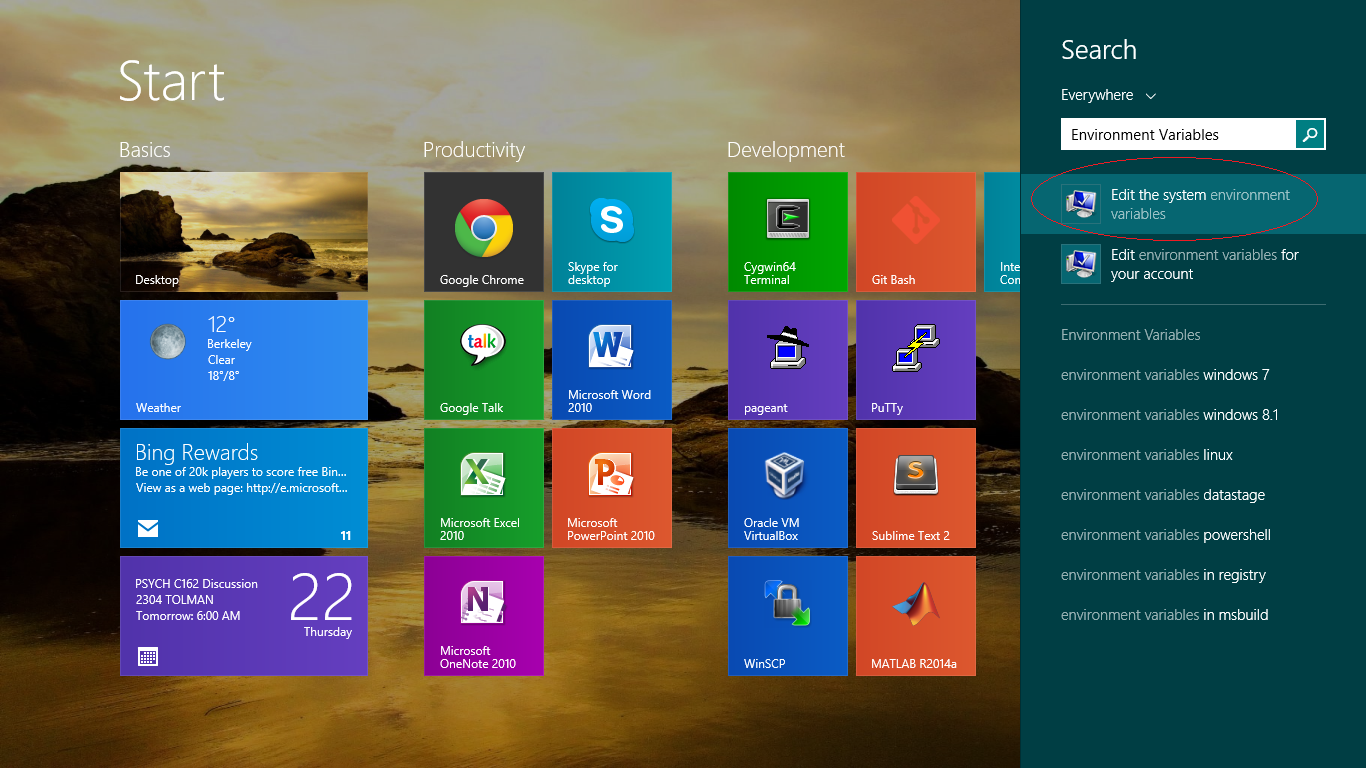
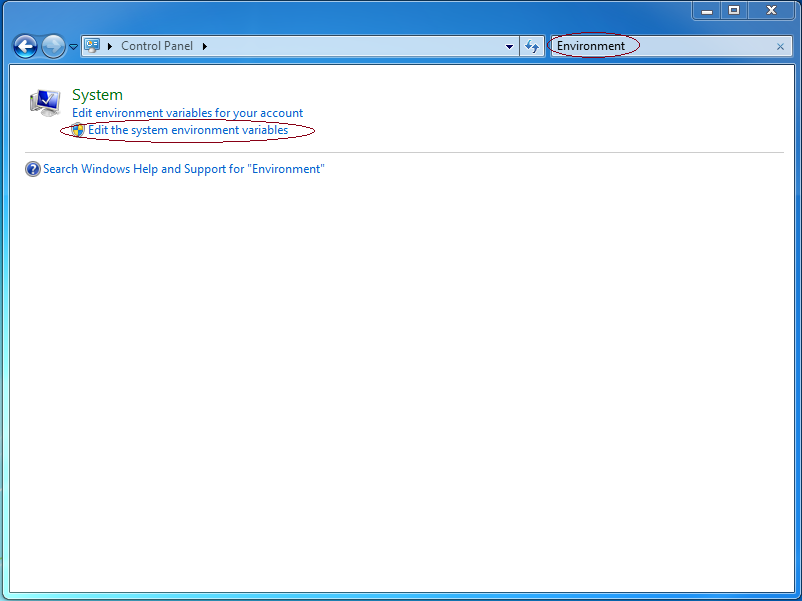
Windows 8/8.1/10: Search for
Environment Variablesin the Windows Menu or Cortana. Select "Edit the system environment variables". Windows 7 and earlier: Search the control panel for the same thing.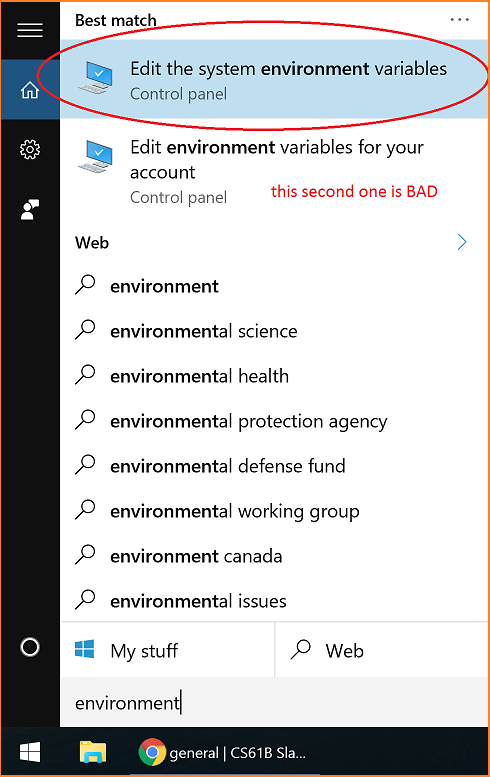
Navigate to the "Advanced" tab, and click "Environment Variables...".
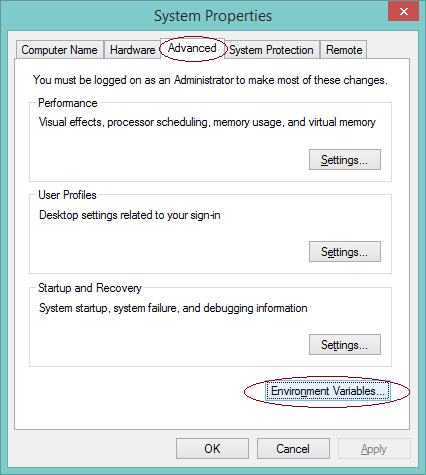
Under "System variables" (this section will be unavailable if you are editing account or user variables), click "New..."
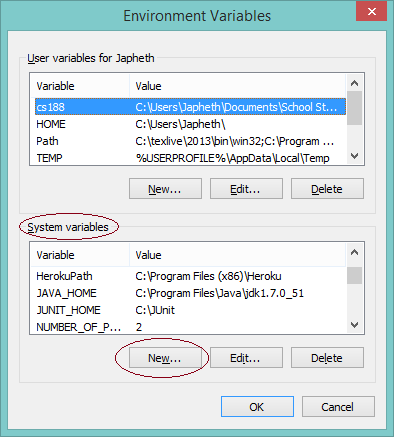
Define the following variables -- click "New..." and use the values specified below as the value of the variable. If the variable already exists, select the variable and click "Edit...", then add the value specified below to the front of the value, followed by a semicolon.
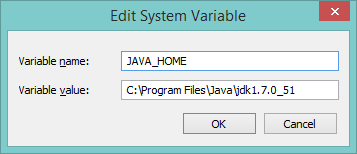
- JAVA_HOME: Set this to the location which you installed Java JDK (e.g.
C:\Program Files\Java\jdk1.8.0_112). Here's an old screenshot for Java 7 (remember, you're installing Java 8!):
- PYTHON_HOME: Set this to the location where you installed Python (e.g.
C:\Python35orC:\Program Files (x86)\Python36-32). - PATH: (This most likely already exists! It may be lower case.) Add
%JAVA_HOME%\bin;%PYTHON_HOME%;to the beginning of the value of this variable. (The%symbols demarcate a path substitution in Windows. Note that there are NO spaces. Putting spaces in Windows path definitions can sneakily RUIN your day!)
- JAVA_HOME: Set this to the location which you installed Java JDK (e.g.
- Save your changes by hitting
OKon the window. At this point, yourjavacshould be working. Close and reopen your terminal (such as Git Bash or Command Prompt) and type injavac -versionand ensure that it respondsjava version "1.8..... If it claimsjavacisn't a recognized command, something is wrong with your path setup. It should be noted that java installation and git installation are independent, and don't affect each other. - At this point, check one last time to make sure
javac,java,git, andpythonare all recognized terminal commands. If they are, you finished Windows Java Setup!
B. OS X Setup
- First, install Java using the instructions provided under the Installing
Java section. Downloading the JDK should also provide
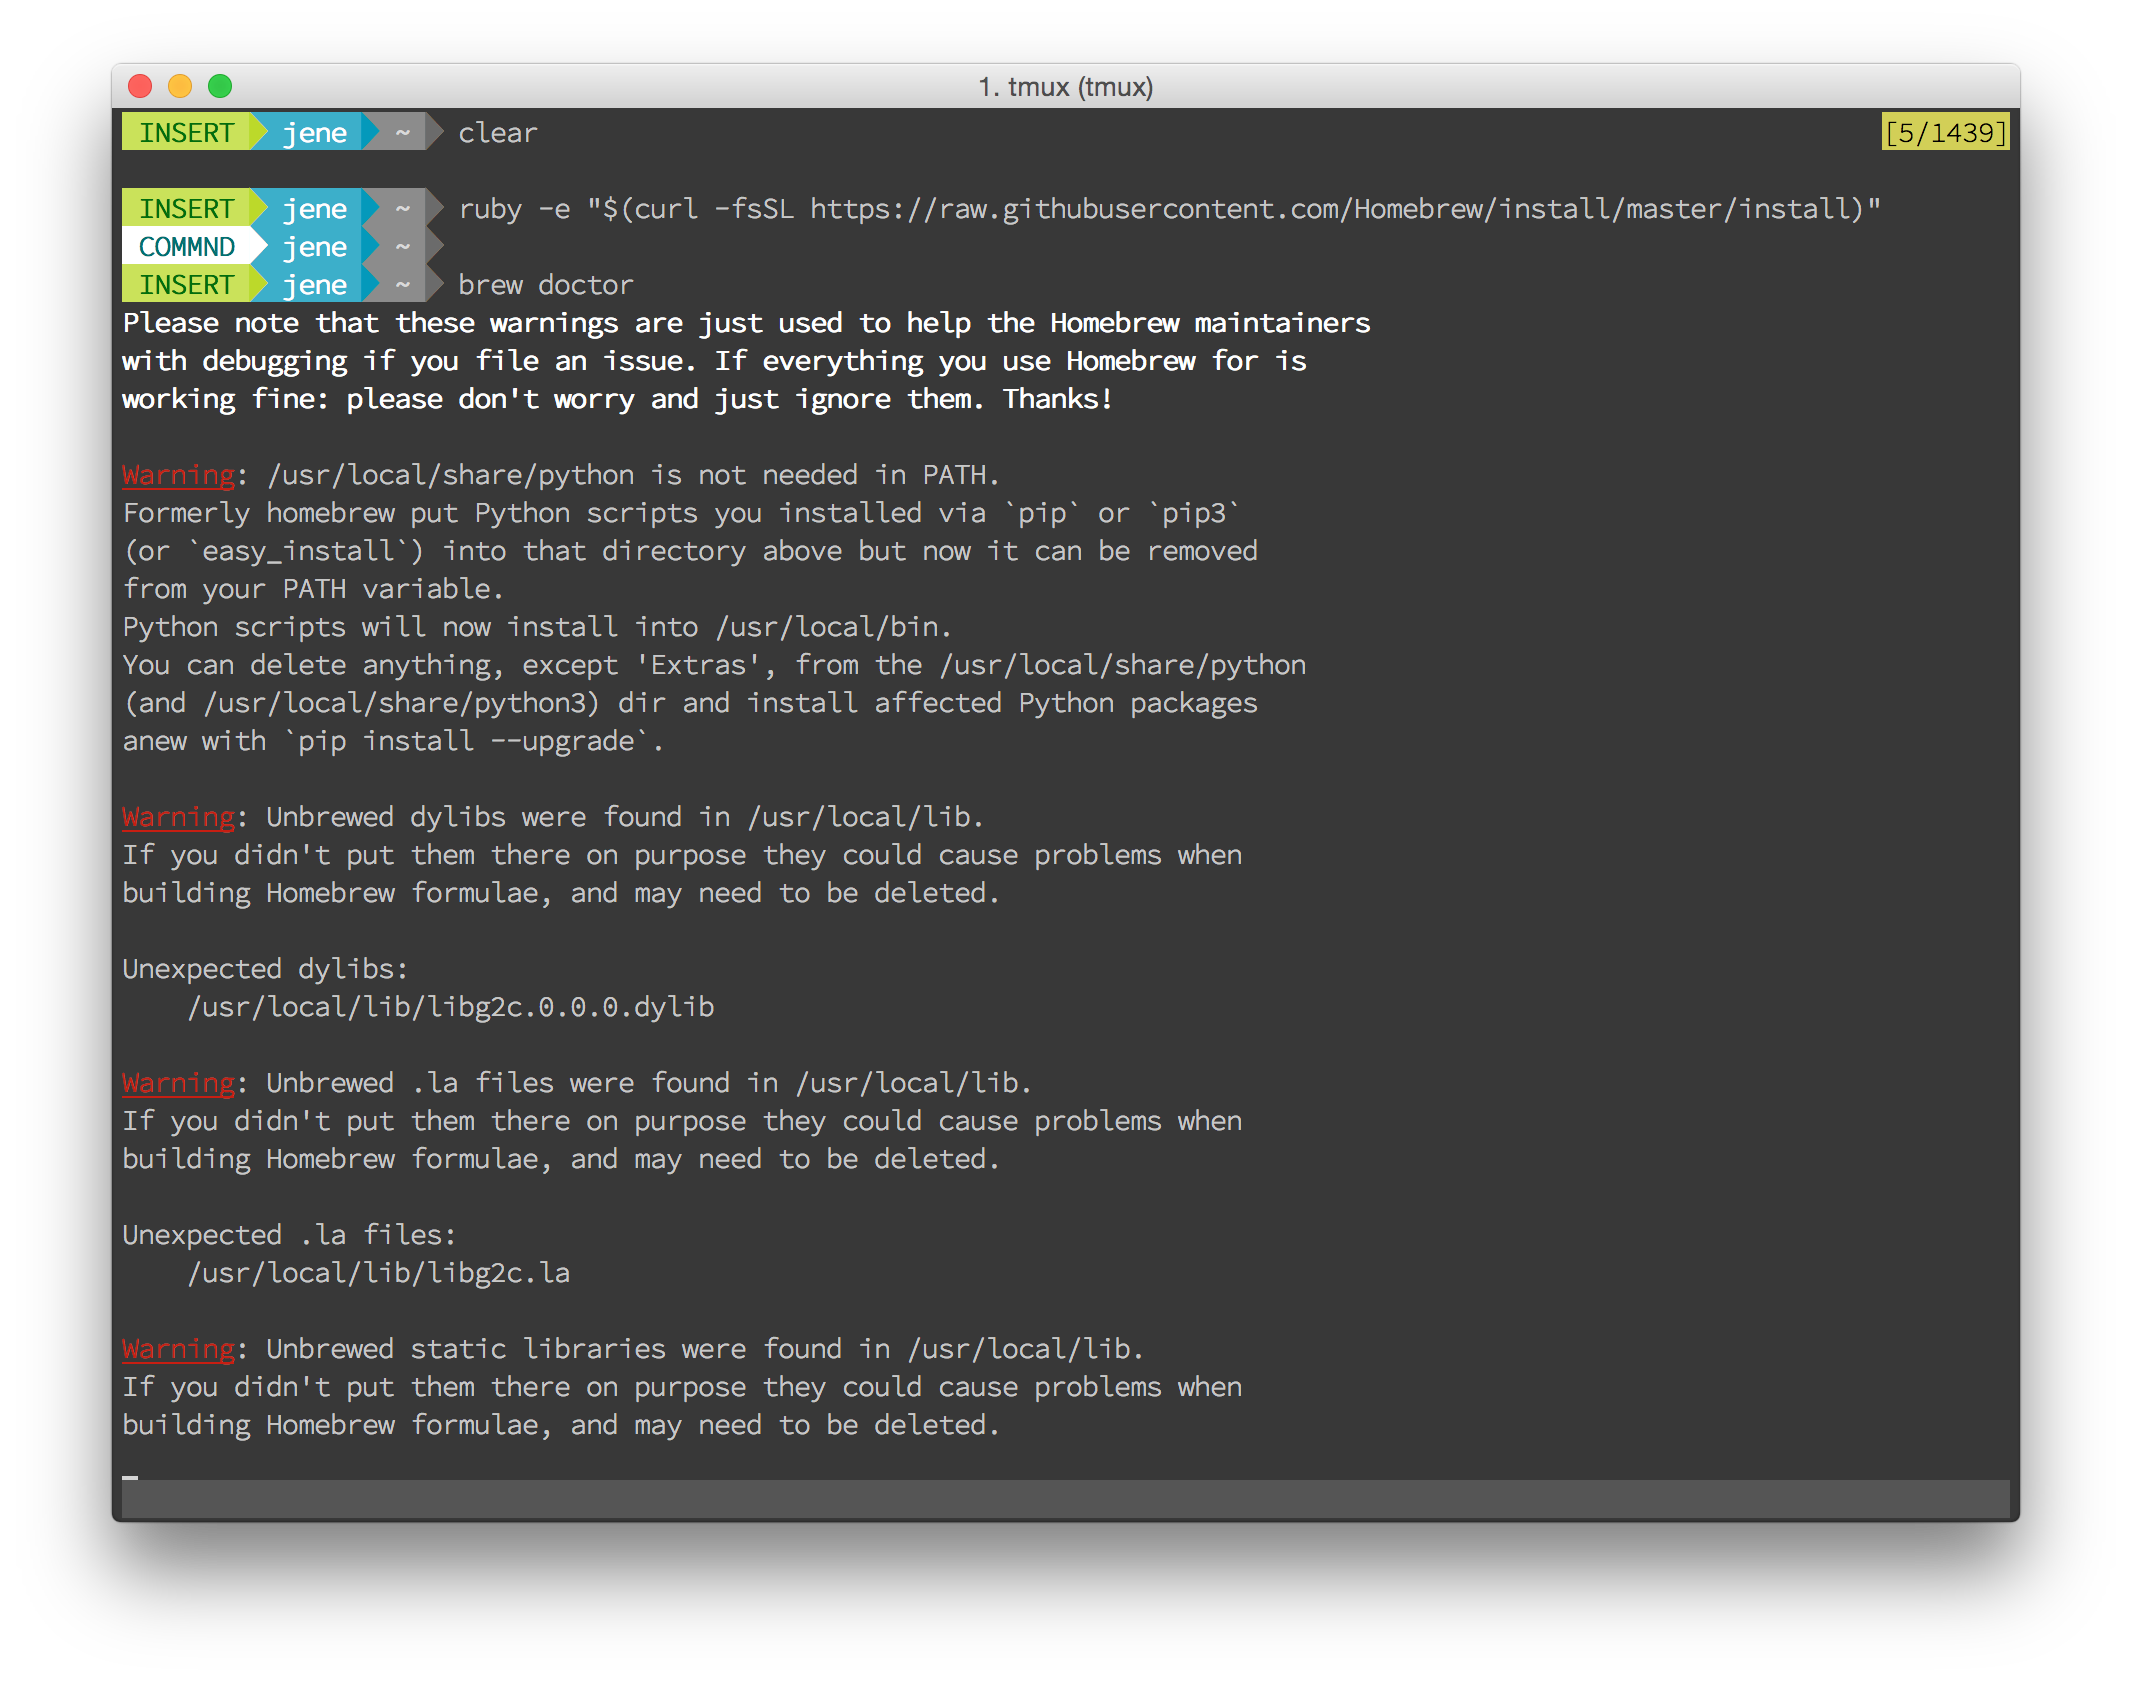
javac, a Java compiler on the terminal. Install Homebrew, a very easy to use package manager. To install, go to your Terminal and enter the following:
ruby -e "$(curl -fsSL https://raw.githubusercontent.com/Homebrew/install/master/install)"Note: During the process, you may be prompted to enter a password. When you enter your password, nothing will display on the terminal, but the computer is actually recording your password. This is a security measure. Just type your password and hit enter.
Then, check to make sure brew is working properly on your system by typing:
brew doctorYou may encounter warnings like this, but you should be fine. Proceed to the next step.
- If you encounter a warning asking you to download Command Line Tools, you will need to do this. Please follow the StackOverflow post here.
Install python3 and git. You can do this by typing:
brew install git
brew install python3
C. Unix and Linux Setup
If you are using a Linux/Unix distro, use your package manager (apt-get, yum, etc) to install the Java 1.8 JDK, python3, and git.
First, check to see if Java is already installed by typing:
java -versionIf you see "The program java can be found in the following packages" or something similar, Java has not been installed yet. You can install java by typing:
sudo apt-get install openjdk-8-jdkTo install python3:
sudo apt-get install python3To install git:
sudo apt-get install gitD. Test Run
Let's try running a Java program to try out your new setup! Just this once, we will tell you to do things without any explanation as to how or why they work. This dark magic will be explained in lab 1 and lecture 1, but for now, is just here for you to check your setup in a quick n' dirty manner.
First, open up your terminal (such as Git Bash) and run this magic:
mkdir -p ~/temp && cd ~/temp # Forcibly creates a folder "temp", and
navigate there
Then, do a platform specific action to open your file explorer in this directory:
- Mac:
open . - Windows:
explorer . - Ubuntu:
gnome-open . - Linux Mint:
xdg-open .ormate .
- Mac:
In this newly opened directory, create a file
HelloWorld.javawith these contents:public class HelloWorld { public static void main(String[] args) { System.out.println("Hello world!"); } }
Okay. Now you're ready to start the real test. Here's a screenshot of your dream goal, a perfect, no-error run-through that indicates your java setup is just fine:
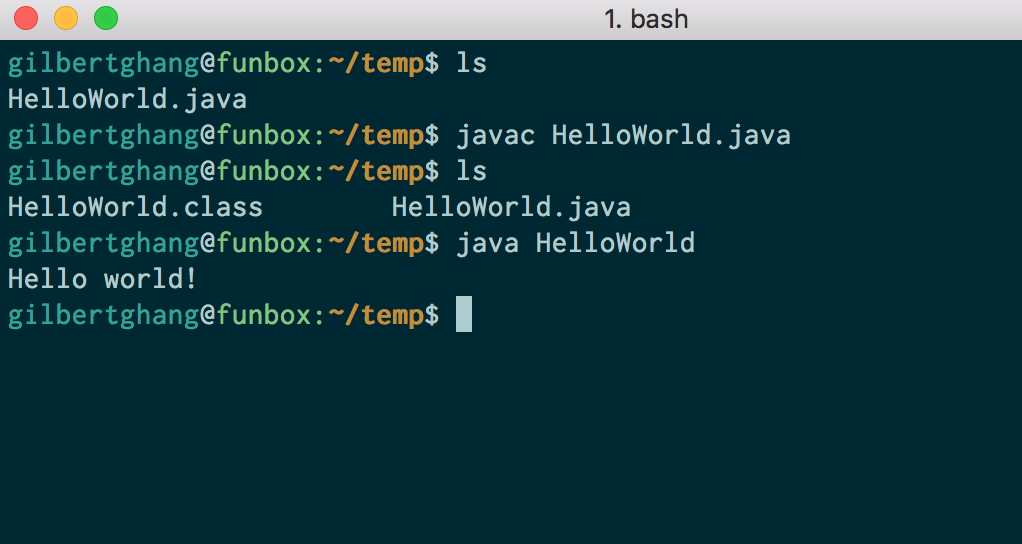
- In your terminal, enter
ls(list the files/folders in this directory). You should seeHelloWorld.javalisted. - Run
javac HelloWorld.java. If this produces any output, then something is wrong with your setup. Now if youls, you should see bothHelloWorld.javaand a freshly createdHelloWorld.class(thejavaccommand created this file). - Run
java HelloWorld. It should print out "Hello world!" for you. If it didn't, something is wrong with your setup! - You're done! You can also delete the "temp" folder and its contents as you please.